I’ve always understood what that phrase meant, but it leapt from the recesses of my mind and into full consciousness yesterday as I spent 45 minutes measuring and cutting pieces for my first sewing project. I had no accidents of cutting, although my adventures were not without mishaps. More on that in a moment.
For reasons I no longer understand, I forwent the sleeping mask in favor of the apron as my initial task. I spent the first 30 minutes watching and following the directions on the instructional DVD that came with my Singer. Threading bobbins and upper parts of the machine are not easy the first time, but I got it done. Then I was ready to tackle the pattern.
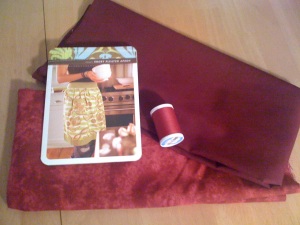
I used the apron card from Amy Butler’s Sew-It Kit. It’s pictured below along with my materials of choice.
Pattern Ease
By no stretch of the imagination was this a pattern for beginners. Any time you see the word “pleats” beginners should run very quickly in the opposite direction.
Seriously, this pattern is probably easy for intermediate sewers, and would’ve been easier for me if it were my 2nd or 3rd project. I underestimated the effort it takes to translate the language of patterns into embodied actions: (wrong side up, right sides together, adjoin neighboring pleats, machine basting, etc.). That, plus having to stop for thread that mysteriously unthreaded itself (multiple times), jammed bobbins, and other trouble shooting, made for a day full of learning.
It took me 6 1/2 hours all told, although a more experienced sewer could definitely do it faster. I can probably make that sleeping mask with my eyes closed now. (We’ll see…)
I did it! I jest, but this was a great victory for me. My last experience sewing was a couple of decades ago. I took a sewing class in high school that shall forever remain a blip on my transcript. Moving on…
In other news, the quilter’s ruler is awesome. It’s a little weird to use effectively at first, but it once you get the hang of it, it’s a definite time saver.
The salesperson at the fabric store was right – it’s really nice to be able to see through the ruler to make your markings. But don’t pay full price! Mine was on clearance for less than $6.
Trouble Spots
Despite how slowly things went, I was doing quite well until I got to the trim bands. The apron has a top band and a bottom band. I diligently followed directions (or so I thought) until I realized I had expertly sewn the top band when it should’ve been on the bottom. I tried to ignore this – after all, both parts had the trim! Eventually, I had to face facts. My seam ripper and I became best friends as I spent 45 minutes undoing the (tiny, tight) stitches on both sides of the apron.
I was amazed to learn that whatever directions I followed had no bearing on the reality of the pattern and the bottom trim did not turn out at all like my first version of the top trim. I don’t know how I mixed up top and bottom and how I totally messed up the directions for that step, but I’ll take responsibility and embrace my new found understandings of pattern lingo.
Would You Make This Pattern Again?
Perhaps. It was a little weird because there wasn’t a pattern per se – there were just directions on how much material to cut and how to put it together. There were also a few illustrations, but I’m not convinced they were that helpful for a newbie. Now that I know what I’m doing, I’d do it again if I thought someone wanted or needed an apron. I would like to find a full body apron pattern though. I’m not sure I find the skirt-only pattern that useful.
xoxo


